Building a wooden fence is a practical and rewarding home project. I remember when I first took on the task of building a fence around my yard. What began as a straightforward plan to add some privacy turned into a project I was genuinely proud of. Building it myself not only saved money but also allowed me to choose materials that suited my home and would last over time.
If you’re anything like me, you’ll appreciate the control that comes with a DIY project like this. You get to make decisions about every detail, from the type of wood you use to the exact placement of each post. It is satisfying to know that every step reflects your choices. Whether you’re looking to create a safe space for your family, add a touch of character to your yard, or boost your property’s value, this guide will walk you through the process.
There are common challenges along the way, but with the right approach, you will be able to tackle them. In the end, you’ll have a fence that you can look at and say, “I built that,” knowing it was made to last.
Planning and Preparation
Before you jump into building your fence, it’s worth taking the time to plan carefully. A sturdy, long-lasting wooden fence isn’t just about the construction—it starts with solid preparation. I learned this lesson firsthand with my first fence project. I was so eager to get started that I rushed through the planning stage. As a result, I found myself making multiple trips to the store for materials I’d overlooked. Let’s focus on choosing the right materials so you can avoid those kinds of headaches.
Choosing the Right Materials
The type of wood you choose will have a significant impact on how long your fence lasts. Not all wood holds up the same outdoors. Cedar, redwood, and pressure-treated pine are popular options because they naturally resist rot and insects. When I built my fence, I chose cedar because I liked how it looked and knew it would last. Years later, it’s still holding up well with minimal maintenance.
- Cedar is a great choice because it resists rot and insects and has a long lifespan. Learn more about cedar.
- Redwood offers similar benefits and has a rich color that can make your fence stand out. Find out more about redwood.
- Pressure-treated pine is treated to resist rot and pests, making it a more affordable option, though it requires regular upkeep to prevent warping. Understand how pressure-treated wood works.
Beyond the wood itself, using high-quality hardware like galvanized or stainless-steel nails, screws, and brackets is key to preventing rust. My neighbor learned this the hard way—he used cheaper nails, and within a few years, they had rusted, causing his fence boards to come loose.
Design and Layout Considerations
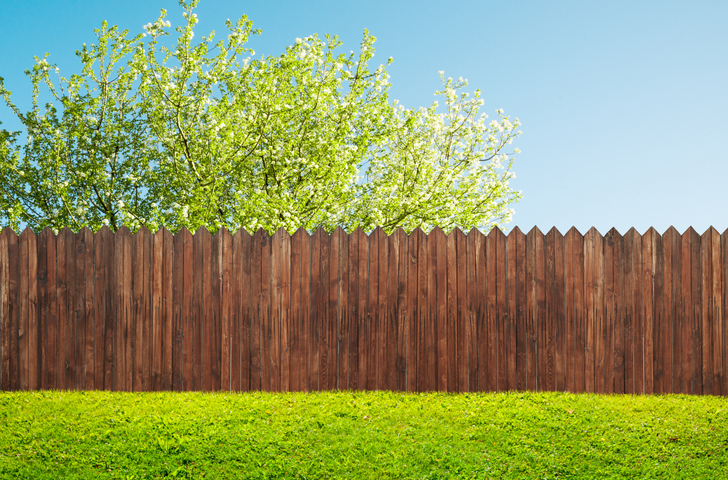
After selecting your materials, the next step is deciding on the design and layout of your fence. Think about what you need from your fence. Are you looking for full privacy with a solid fence, the classic look of a picket fence, or something more rustic like a split rail fence? Each type has its advantages and disadvantages.
When I built my fence, I went with a privacy design. My backyard is next to a busy street, so having that extra seclusion was important to me. It made a noticeable difference in how much we enjoy our outdoor space.
- Privacy fences offer full seclusion but require more materials and effort. Here are some tips for building a privacy fence.
- Picket fences provide a traditional look with some visibility but less privacy. Check out different picket fence designs.
- Split rail fences are great for larger yards, giving a simple, rustic look, though they offer less privacy. Learn more about split rail fences.
Once you’ve chosen a style, carefully measure your yard and mark where the fence will go. Accurate measurements are crucial—they help you purchase the right amount of materials and ensure your fence lines up properly. I learned to double-check my measurements after a friend misjudged the length of his yard. He ended up with extra materials that he couldn’t return, which turned out to be a costly mistake.
It’s also smart to check with local authorities about any rules or permits you might need before you start. It may seem like a hassle, but it can save you a lot of trouble down the road. Spending a little extra time planning now will pay off when your fence is standing strong and looking good for years to come. Here’s some info on local fence regulations.
Step-by-Step Guide to Building the Fence
With your materials ready, it’s time to start building your fence. These steps will guide you through creating a sturdy structure while helping you avoid common challenges.
Digging and Setting the Fence Posts
Getting the posts right is crucial to ensuring your fence stays upright and secure. I learned this the hard way when I built my first fence. I didn’t fully grasp how important it was to set the posts correctly, and after the first storm, a few started leaning. Here’s how you can avoid that:
- Dig the Post Holes:
- Dig each hole to a depth that’s one-third the height of your fence, with a minimum depth of 2 to 3 feet. This depth is crucial for keeping the posts stable, especially if you’re dealing with high winds or loose soil. Here’s a guide on digging fence post holes.
- Position the Posts:
- Center each post in its hole and make sure it’s vertical.
- Pour Concrete Footings:
- Fill the hole with concrete around the post, ensuring it’s fully covered.
- Use a level to check that the post is plumb before the concrete sets. A crooked post can throw off the entire fence. Learn how to mix and pour concrete.
- Let the Concrete Cure:
- Allow the concrete to cure for 24 to 48 hours. This waiting period is important. It ensures the posts remain solid and don’t shift, which could cause problems later. Read more about the importance of concrete curing times.
Attaching the Fence Rails
Once your posts are set, the next step is attaching the rails. These provide the framework for your fence and set the foundation for the boards or panels.
- Align the Rails:
- Depending on your design, position two or three horizontal rails between each set of posts. These rails will support the fence boards.
- Secure the Rails:
- Use galvanized or stainless-steel screws to attach the rails to the posts. This helps prevent rust and ensures your fence lasts longer. Learn why galvanized hardware is important.
- Make sure the rails are level and evenly spaced. Careful measuring ensures the fence functions correctly and looks good.
Tips:
- Secure the rails well, as they bear the weight of the fence boards. Double-check alignment with a level to avoid issues later.
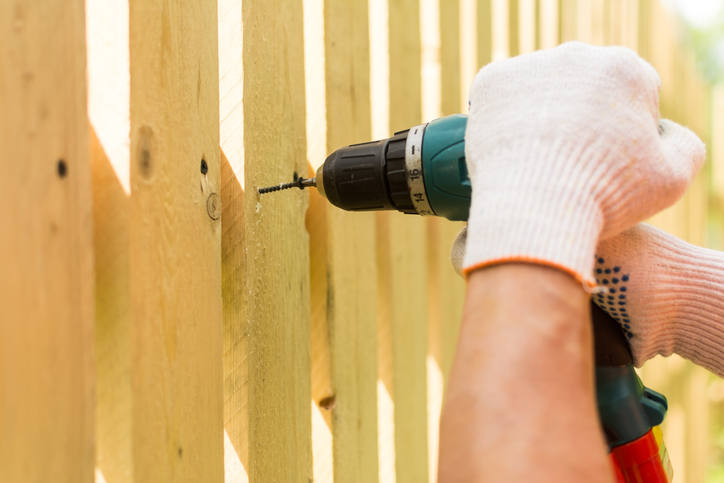
Installing the Fence Boards or Panels
Now it’s time to attach the boards or panels and complete your fence.
- Attach the Fence Boards or Panels:
- Start at one end and attach each board or panel to the rails.
- For privacy fences, place the boards close together to minimize gaps. When I built my privacy fence, I made sure the boards were snug to avoid gaps that could compromise privacy. Check out tips for building a privacy fence.
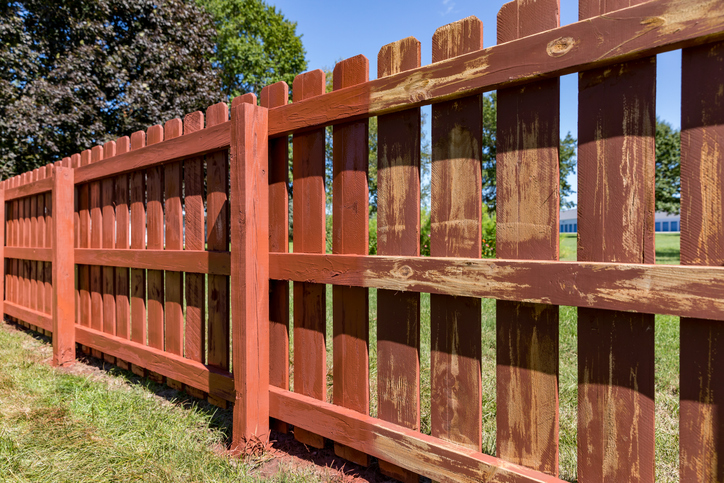
- For picket or split rail fences, maintain consistent spacing for a neat, uniform look.
- Use Spacers:
- Use spacers to keep the gaps even between boards. This allows the wood to expand and contract with changes in the weather and helps prevent warping. Here’s why wood expands and contracts.
Tips:
- Proper spacing is key. It helps maintain your fence’s appearance and structural integrity.
- Align each board carefully to avoid issues like bowing or gaps that could weaken the fence.
By following these steps, you’ll build a fence that not only looks good but also stands up to the elements. I’ve made my share of mistakes along the way, but with careful planning and attention to detail, you can avoid them and create a fence that serves you well for years to come.
Finishing Touches for Longevity
To make sure my wooden fence lasts, I focus on a few key tasks. I’ve found that putting in a little effort now can save me a lot of time and hassle later.
Weatherproofing and Sealing
Wood needs protection from the elements. When I built my first fence, I almost skipped sealing because I was eager to finish the project. Thankfully, a friend who had been through the process before reminded me how important it was. Sealing keeps my fence strong and looking good.
Here are a few options I’ve used:
- Sealants: These protect the wood from moisture without changing its color. I used a clear sealant on my cedar fence, which helped preserve the wood’s natural look. Learn more about using sealants for wood.
- Stains: Stains protect the wood and let me choose a color that enhances its appearance. When I stained a deck, I liked how it brought out the wood grain while adding protection. Check out tips on choosing the right stain.
- Paints: Paint creates a barrier against the weather but requires more upkeep. I painted an outdoor shed once, and although it looked good, I had to touch it up every few years. Find out about the benefits and drawbacks of painting wood.
Whatever finish I choose, I make sure to apply it evenly and let it dry completely before exposing the fence to moisture. I also reapply every few years to keep the fence in good condition.
Maintenance Tips
With the right care, a fence can last for many years. Regular upkeep really makes a difference.
Here’s what I do:
- Regular Checks: I walk around my yard each spring to inspect the fence for loose boards, rusted nails, or signs of rot. Catching small problems early prevents bigger issues later. Learn how to inspect and maintain your fence.
- Preventing Rot: For areas prone to rot, especially at the bottom of the posts, I use a wood preservative. I learned this after a few of my posts started showing signs of rot. Treating them early helped extend their life. Read about how to prevent wood rot.
- Repairing Damage: If I notice any boards warping or cracking, I replace them to keep the fence strong. After a rough winter, I replaced a few boards to maintain the fence’s integrity. Get tips on repairing wooden fences.
By staying on top of these maintenance tasks, I help my fence stay sturdy and look good. A little attention now can save me a lot of work and money down the road.
Common Pitfalls to Avoid
Even with experience, I’ve faced plenty of challenges in my DIY projects. I’ve made mistakes along the way, but I’ve also learned a lot. Here are some common issues I’ve run into and practical tips that might help you avoid them.
Mistakes in Post Setting
One of the first mistakes I made was not setting the posts deep enough. I was in a hurry and thought I could save time by digging shallower holes. That turned out to be a big mistake. When the first storm hit, the fence wobbled, and I had to go back and redo the job. Now, I always make sure the posts are deep and secure.
Here’s how I set my posts now:
- Dig the Holes:
- I dig each hole to at least one-third the height of the post, with a depth of 2 to 3 feet. This helps keep the posts stable and able to withstand strong winds. Learn more about digging fence post holes.
- I also make sure the hole is wide enough to allow for concrete around the post, which adds stability.
- Set the Posts:
- I place the post in the center of the hole.
- I use a level to make sure the post is perfectly vertical.
- Fill with Concrete:
- I pour concrete into the hole around the post, making sure it fills completely. Here’s a guide on mixing and using concrete.
- I smooth the surface with a trowel and check again that the post is straight.
- Let the Concrete Cure:
- I let the concrete cure for at least 24 hours before attaching any fence panels or rails. Read about the importance of concrete curing.
Quick Tips:
- I always check the depth of each hole before setting the posts to make sure they’re deep enough.
- Sometimes I use gravel at the bottom of the hole before adding the post and concrete. It helps with drainage and adds stability.
I also learned that posts that aren’t level can cause a lot of headaches. On one of my first fences, I rushed through the process and didn’t check the posts often enough with a level. The result? A crooked fence that took extra time to fix. Since then, I’ve slowed down and made sure to check each post carefully to keep everything straight.
Using Low-Quality Materials
Another lesson I’ve learned is that trying to save money by choosing cheaper materials doesn’t work out in the long run. On one project, I decided to go with lower-quality wood to cut costs. Within a couple of years, the wood started to warp and rot, and I ended up spending more on repairs than if I had just used better materials from the start. Now, I always choose wood and hardware designed for outdoor use, knowing they’ll keep my fence strong and looking good for years.
Quick Tips:
- When buying materials, I choose wood that is treated or naturally resistant to rot, like cedar or redwood. Check out this guide on selecting the best wood for your fence.
- I also use galvanized or stainless-steel hardware to prevent rust and extend the life of my fence. Learn why galvanized hardware is important.
By avoiding these common pitfalls, I’ve been able to build fences that last. My experience has taught me that a little extra care during the building process goes a long way toward making sure your fence is solid and durable.
Final Thoughts and Encouragement
Building a wooden fence is more than just a home improvement project—it is a way to add value to my property and put my DIY skills to the test. When I built my first fence, I felt both excited and a bit nervous. But by taking the time to follow each step and focus on the details, I ended up with a fence that has held up well over the years.
The key to building a solid fence is in the planning and steady effort. I quickly learned that rushing leads to mistakes. Now, I take my time, think through each part of the project, and do not hesitate to ask for help when needed. I remember calling a friend for advice on setting posts, and that one conversation made a big difference in how everything turned out.
With patience and effort, I know I can build a wooden fence that not only adds value to my home but also gives me a real sense of accomplishment.
Now that I understand what it takes to build a wooden fence, I am ready to gather my tools, buy my materials, and get started. Breaking the project into manageable steps helps me stay focused and avoid feeling overwhelmed. I am looking forward to the satisfaction of creating something lasting for my home.